POTW: Colossalcon 9
June 10, 2010 at 7:01 am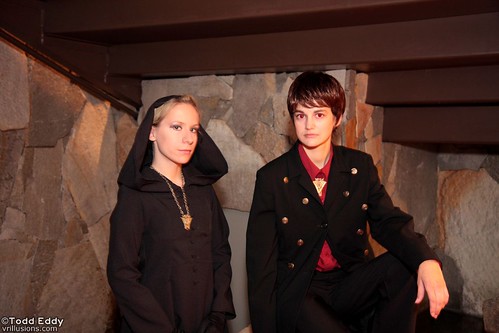
Not sure where to begin for this con. Actually for the most part things were all right, probably one of the better cons I've been to aside from Saturday night which I'll get to in a moment. It's smaller than Ohayocon but a little larger than Anime Punch and felt like there's a lot less drama happening around. As for Saturday night, it started out around 3:00 AM when the fire alarm went off. Everyone started to go outside when then other con-attendees (not staff) were like "There's a tornado warning, we should go back inside" which we did and then just went back outside. Was all rather confusing. After that we were told everything was closed till 7:00 AM while they look into the alarm issue (FWIW it was a fluke related to the fluctuations of the weather outside). So everyone goes back to their room. I'm on the patio and I start to hear tornado sirens. Long story short we were evacuated to the basement with the rest of the hotel to wait out a Tornado that possibly touched down in the area. There was an earlier one at around 11:00 PM about 50 miles away. Never found out if one touched down at 4:00 or if it just looked like a tornado was about to form. The whole ordeal was quite... memorable to say the least. But nothing happened and aside from working on a few hours sleep on Sunday everything was fine.
Only had one photo shoot this time of... two characters from Twilight (not the two main characters). I don't know anything about the series but I guess these were the evil ones, or something. I kept getting thrown off by the one person's red contacts. I'll look at the screen and know the flash shouldn't have created red eye and yet I see it. Also not to happy with the flash. Not sure what caused it to not do what I wanted and didn't really notice till I saw them on the computer. Main thing I regret/learned from this is to use the WhiBal white balance card I have. I had it on me but just didn't think to use it. Made color correcting the last couple shots kinda hard. Unfortunately the one I was looking forward was one at night. Brought my light stand and outside wasn't windy which is good for my umbrella but no one showed up. I almost think there was confusion between "registrations" since I just said I'd meet them at registration and there's one to get your pass, another for cosplay, another for games, etc. Now that I've been there I'm more familiar with the layout to give better instructions for a meet spot.
POTW: Tyler Elevator
June 3, 2010 at 6:50 am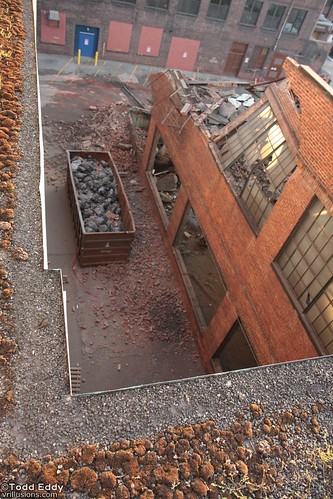
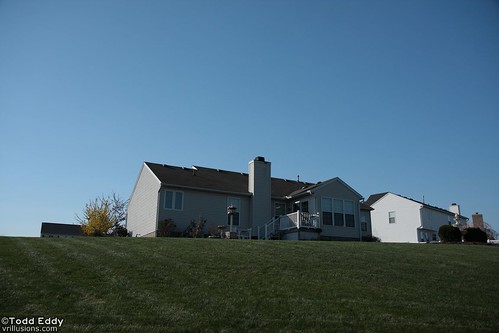
I work at what was once an old elevator factory. The number of companies currently in this complex outgrew the limited amount of parking space. To fix that they are tearing down a couple of the buildings to turn the area into a parking lot. Demolition has been fast. It's only a week later and it's almost completely gone. As far as what this once was, all I know is it was once an elevator factory. This has backfired on us since all the elevators are custom elevators they tried out, so there are no standard parts available. The elevator in our building seems to always be down. Usually I just take the stairs, it's safer that way. Glad we're on the third floor and not the seventh. View may be better on seventh but I don't want to do all those stairs when the elevator is down for repairs.
Like this picture from the group because of the perspective it does. I'm still trying to figure out how to show depth in an image. For example that strip of ground on the left and bottom are the roof. The dumpster is three floors below. Because of the wide-angle is did some warping so the dumpster seems to be on an angle when it's flat. An interesting side effect I noticed is it gives a slight tilt-shift look to that part of the image because it's not in focus. It's subtle, but it makes the distortion look a little better. The rest of the pictures can be found here.
I'm going to be at ColossalCon this weekend. Besides meaning next week's picture is going to be of a person for a change it also means I'm going to do a couple more photo shoots. Hopefully applying what I've learned in the past to make these even better.
POTW: Masonic Temple Scouting
May 29, 2010 at 3:20 am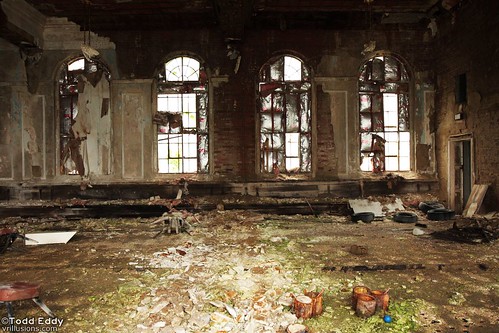
Weather wasn't all too well but went to check out a masonic temple. Didn't take many while I was there but liked this the best. The lighting looks "interesting" (to me at least) because I'm on one side of the hall facing the windows with my back against the windows on my side. So gives an interesting effect from having a lot of light on one part of the image. Will need to revisit it at some point
POTW: Chippewa Lake Amusement Park
May 20, 2010 at 5:35 am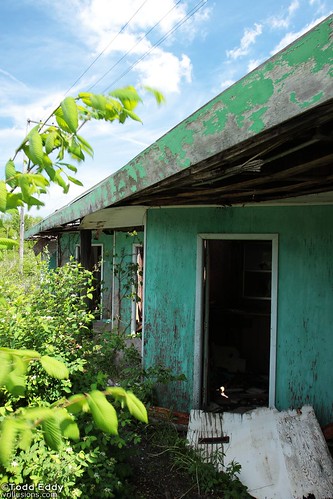
This week I went to Chippewa Lake. It's been a spot I've been meaning to get to for a while. Late last year the owners started to open a part of it to the public. It's pretty much the only time you can see it now since apparently it's pretty well enforced on other days. It was also interesting talking to a couple people that actually ran the rides when it was in operation. Unfortunately I didn't think to get a picture of them in front of their ride.
This is the first actual location where I made heavy use of my polarizing lens. Not as easy as one would think to get that dark blue sky. Also I didn't notice till I got home but there was dust somewhere (that's the dark spot in the other photos). Had to clean everything twice before it finally went away. Chose the picture because most of the pictures I see are of the ferris wheel, roller coaster, or the tumble bug. A lot of the trees have been cleared away so I'm sure the parks days are numbered. Although I think they're going to keep a couple of rides like the ferris wheel when they build the park.
Rest of the pictures can be found here
POTW: Not Legal for Trade
May 13, 2010 at 3:51 am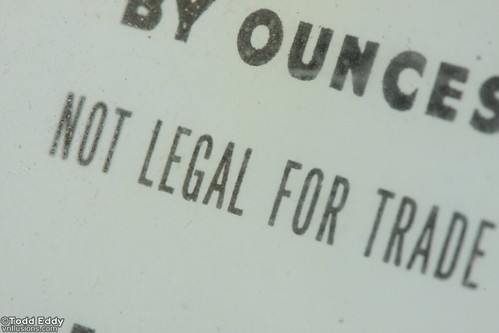
Not much to say here. Macro shot of a baby scale. Also took a picture with the text level but liked this one better.
POTW: Panning
May 7, 2010 at 5:01 am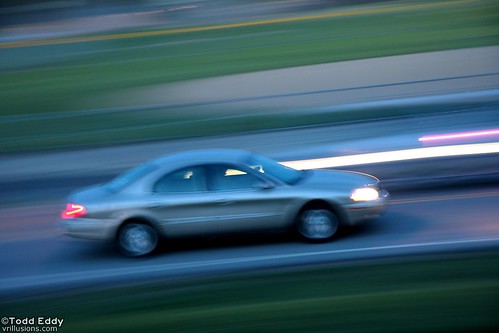
I knew I was going to have a busy weekend so Friday night I walked to the park nearby to take a picture of something. Decided to try out a panning shot. This is the best one of the group. Not happy with moving around but I was hand-holding this. A tripod would have helped eliminate the shakiness of it but I guess it isn't bad for my first attempt at it.
Making this brief because I'm busy redoing my off-site storage drive. I use JungleDisk and I encrypt the drive with a password, which is just a random string I store in KeePass. Well I noticed the password for one of them wasn't updated. The password is also encrypted in the config file on my computer. Essentially I had no way to access the drive if something happened to my computer, which is the whole point of off-site backups. Opened a support ticket hoping they would tell me how it's encrypted. Don't see the security risk in it as it's a config file on my computer. Also I know they can decrypt it because JungleDisk has to in order to access the drive. They wouldn't tell me though. In their defense I am warned to backup the password. Still annoyed they wouldn't tell me when they have the code to access the files freely available. I checked it and didn't see any mention of the config file encryption though. My only options were to send the file to them which would then breach the 100% security I have now, or delete it and re-upload everything. Again, this tells me that they indeed know how to decrypt it but just isn't telling me. When JungleDisk was first around they were far more open about things. Since they got bought by RackSpace it just seems to be going downhill as far as openess goes. I'm sure if they didn't have the source code available at launch they wouldn't have still kept it available. I'm just annoyed because they're security now is basically security by obscurity. Could I have reversed the password? probably. Not only would it took me a while, it would have probably violated the EULA (most say you can't reverse engineer the software) and the DMCA since I'm dealing with encryption. So I guess lesson learned and I'm starting the backup process of uploading 26gb of pictures which is going to take a few days (that's what happens when you take pictures in raw). Fortunately this was a RackSpace disk, and the one positive thing since they bought JungleDisk is I don't get charged bandwidth to upload and download to RackSpace like I am with Amazon S3. I still have it though and actually backup my pictures to both since it's not expensive. I just upload to Amazon once a month or so to save on bandwidth.
POTW: Rocky River Metropark
April 29, 2010 at 5:09 am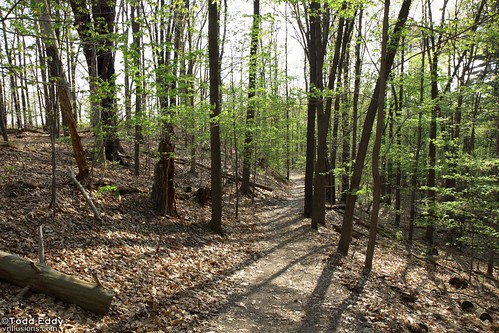
In honor of Earth Week I went to a metropark on Earth Day. This is the Rocky River Metropark located right next to the Cleveland International Airport. In fact I tried to get a picture of a plane flying above the trees but I only noticed a couple planes the whole time I was there. Also found an apparent hang out spot for kids after school. Was down near the "falls" which took quite an effort to get to and there were a bunch of kids down there, jumping between rocks and balancing on logs; all the stuff parents always tell kids not to do. Worth noting that all the pictures in the gallery, including the longer exposure ones, were hand-held. My lens has a 3 stop image stabilizer and I took advantage of that.
I have found that I could have really used a telephoto lens. Saw a squirrel that was relatively close but not close enough for my Canon EF-S 17-55mm f/2.8. I had my Canon EF 100mm f/2.8 Macro with me but that still wouldn't have been close enough. Probably next purchase is going to be Canon EF-S 55-250mm f/4.0-5.6 IS. It's not expensive and from what I can tell on the reviews the quality for the price is amazing. After that I don't know if I want to go for a super wide angle or a better quality portrait lens. Although I could probably just use my 100mm for portraits. Beyond that it's one of the the 70-200mm lens, which are all pricey. Would probably get the Canon EF 70-200mm f/4 L IS USM Lens which is smaller, lighter, and costs less than the f/2.8 version.
POTW: Lakeview Cemetery
April 23, 2010 at 9:39 am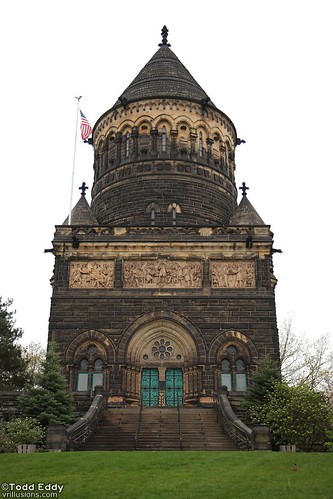
While running around doing some errands on Sunday I decided to check out Lakeview Cemetery. It was an overcast sky and has been raining off and on so I figured it would create a good backdrop for a cemetery. For those not from around the area, Lakeview Cemetery is a really big cemetery near Cleveland that is the final resting place for several famous people from around Cleveland. One of whom is former president James A Garfield, which is what this picture is from.
Ironically there is a picture of the monument on that wikipedia page that looks pretty much exactly like this one. To the point I was going to do some different post processing to it but I decided against it. Current trends with pictures in cemeteries is making it black and white or sepia and perhaps do a slight blurring to give it an antique feel to it. I completely went against that in this picture. I turned up the sharpness as much as I could before it started to look bad and did the same for saturation. Again I debated making it over saturated but decided against that. Looking at the final image and I realized both the sharpening and saturation which I thought were extreme at the time doesn't look that bad now. The original image was quite dull looking because of the overcast sky. So I essentially took what would have been an already dull looking image and brought it back to what it probably looks like on a sunny day.
POTW: Polarizers
April 16, 2010 at 5:38 am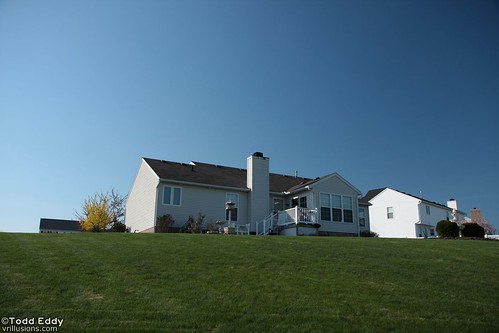
Ever since I had my Canon A80 and heard you could add an extension tube to put filters on it I've wanted to get a polarizing filter. In fact, it was a selling point that I could add filters to it. Unfortunately It was never a huge priority and so I never did get any filters or even the extension tube needed for them. Now, after owning a dSLR for over a year (invoice date was March 13th of last year), I finally have a polarizing filter.
I first did some test shots around the house trying to remove reflections off windows and stuff and noticed things are quite as obvious as I thought. At any rate I was at my parent's house mowing the lawn and I brought my camera with me. It was a gorgeous bright day out and figured it would be perfect for testing out the filter. In these shots the sun was camera left as you can tell by the shadows on the trees. I shot the above picture and immediately removed the polarizer and took the picture below (I never removed the UV filter I have on the lens)
A couple things are immediately obvious. First the grass looks really bad compared to the polarized one--I removed all the reflections from the grass. Also the sky in upper right is a much darker shade of blue than the left side. I didn't know this at the time but later on found this nice page explaining how polarizing filters work and--more importantly--how to use them. Apparently for the sky I was exactly at the right angle as I should have been 90° from the sun instead of more like 60°. Also since I used a wider focal length that makes the color shift more noticeable. Personally I like the graduation like that, although I would have preferred the whole sky to look like how it does on the right. If I spent more time with trial and error I may have come up with something better but these two images give a good comparison I think.
I went to an abandoned place last week as well. I was feeling pretty tired and didn't feel that well from seasonal allergies, so I plan on going there again at some point. That or I'll use what I have as a stand-in in case I skip a week.
In related news, I had a slight panic attack a couple days ago. I am in the process of joining a couple model sites in hopes I can do some more model photography. While browsing through the images in DPP I noticed several of the images from the photo shoots I did at anime punch were partially corrupted. It was odd because I didn't notice it while first editing the pictures and it only really affected the thumbnails. The full image seemed to be fine. After posts to several forums it finally clicked that I have the past 15 or so days of off-site backups stored through jungledisk. I went into there hoping I imported them and held off a day before starting to post process them. Sure enough I was able to recover the untouched files and replace the corrupt files with them. Not sure what caused it. The files are stored on a drobo which should handle any read/write errors. All I can think of is I "saved" the files by closing DPP and it prompting me to save the images. I've done that before when I've edited a lot more files and never had any issues, which was odd. Only other thing is the file got corrupted when it was being written to the drobo. I'm just glad I had those backups. Unfortunately since I've bought jungledisk for a one time price they have now gone to a subscription only based model, which disapoints me. At least I got grandfathered in to the non-subscription version.
POTW: Anime Punch 2010
April 7, 2010 at 5:08 am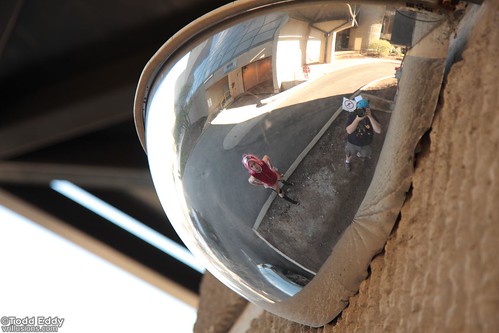
Guess subtitle this "Behind the Scenes." Went to Anime Punch over the weekend. It takes place in Columbus and is much smaller and more specialized than Ohayocon (only other convention I've been to). Anime Punch strives to be an anime convention, not a japan convention or anything convention. They've received quite a lot of flak for it and I know people that have boycotted it because of issues that stem from it. But the convention makes the valid argument that Ohio has a bunch of conventions which allows for this one to be more specialized than others. The good thing about the smaller convention is the more intimate things feel. Instead of being a single person in a swarm of thousands, you're someone in a group of hundreds. Bad thing is most of the time the hallways didn't really have that many people which is why I have absolutely no pictures from just walking around the convention.
This picture was from one of the photo shoots I did. Showcasing it here since it's about the only way it will see the light of day. As a portrait it's horrible. Mirror itself is dirty, you can see me in it, and you can't even see the model all that well. It was one of those "Hey, I wonder if this would work" shots and immediately rejected it. This type of mirror makes it practically impossible to take a picture without me in it. Tried the same effect in another mirror that I could have done without me in it but the mirror was so dirty you wouldn't see anything. Even with all that going against it, I still like it. Had a few good/interesting shots from the photo shoots. Where the first one I did at Ohayocon there was only a couple I really liked there were quite a few from both of these that I liked.
The other photo shoot felt like I was back at square one again. It was a group of four people from the same anime. From a logical standpoint that means it should take four times as long to do. With my current average time of like 15 minutes (I can see the professional photographers that may be reading this roll their eyes) that means it should have lasted for an hour when in reality it was more like a half hour. I did remember to take in consideration there are four people in the same frame. So when I had them looking off camera I couldn't just tell them to look to the left because they would all be looking at different spots. Sometimes that's what you want but other times I had to find some object for them to all look at. It was also more difficult because I was pretty much unfamiliar with the anime. The night before I watched the first couple episodes to get some sense of the series but I was still flying blind for the most part. This was fixed somewhat simply by asking how they related to each other. For example if two of them were sworn enemies you wouldn't have them standing next to each other acting like best friends. Add to all this I got to the hotel maybe 40 minutes before the shoot and it was all rather rushed. So I had the same lessons learned as I did from the photo shoot at ohayocon. Slow down, double check composition, etc. Really the big thing was slow down. Looking back I noticed I felt pretty rushed. Not sure if I felt more intimidated by now being director over four people instead of just one or if it was because within minutes of getting settled in the hotel I had to run off to do the photo shoot.
Although I'm pretty good at hiding it I'm actually really nervous during these photo shoots. Not only do I have to be social with people I hardly know but I need to maintain a leading role as the "expert"--I know what is going to work and what isn't when taking a picture. As far as technical knowledge of how to operate my camera I'm set. It's the guiding other people that I need to work on. Also some things that I should have caught in camera but didn't. For example at one point for the second photo shoot (the one the above picture is from) she's up in a tree--her idea, and she climbed it in heels no less--I'm over in the other tree so we're both at the same level. Didn't notice it when taking the picture, reviewing it at the time I took it, or looking it over back at the hotel room, but there was a parked car in the background. That should have been obvious to me when framing the shot in the viewfinder. Another thing I should have done is utilize the fact she's five feet above the ground and took a picture from ground level looking up which would make it look like she's farther up. Looking back at that specific position and I think it was another one of those times I felt rushed. I'm sure it wasn't comfortable being crouched on a branch in a tree so I was trying to get some pictures done as quick as I could. Again I should have just maintained an open line of communication, just tell her to let me know when she wants down and took more time to explore other angles that may have come out better.
There was another picture that was quite uncomfortable for me which was the closeup. After I did the first photo shoot and looking them over in the hotel room I noticed I got some decent pictures of them individually but I didn't have any real close up pictures. I knew I wanted to do this for the second photo shoot. A couple problems I immediately noticed. First is my general shyness and being extremely self-concious of other people's comfort level and personal space, especially people I don't know all that well. The primary lens I'm using is the lovely Canon EF-S 17-55mm f/2.8. 55mm for a closeup means I'm going to be within a couple feet of the person (which for me feels really close). Also I have to assume that this person has never had a photo shoot done before and need to get them used to having someone snapping away pictures. I solved this by telling myself to wait till the middle or end of photo shoot. At that point the whole photo shoot process would no longer be a completely foreign concept. I also know that my nerves tend to settle down pretty quickly once I get into the groove of things. So by the time I found an opportunity to do a close up I didn't give it a second thought. And with only one picture I nailed it.
So lessons learned from these photo shoots: really try to get there early to scout the area and get into "photographer mode." Also still need to not rush things. I should also get into the habit of reviewing the photos with the person or persons. That way if there's something that either the subject or myself notices we can retake right there. Still like doing photo shoots of cosplayers because things like posing aren't as complicated. They're used to posing for photos as it is. Also, as much as I've mentioned how nervous I get during these, I've found I'm not as much interested in the pictures but the people I meet. It's almost like photography is an ice breaker to meet new people. That could also mean that the photography aspect is so second nature to me that it's a non-issue, but interacting with people is a new and enjoying thing. Explains why I don't have much interest in wedding photography even though that's where the money is. After the first couple weddings it's just taking the same pictures over and over again. I might do senior photography and other type of portraits because I enjoy getting to know people and tailoring the session to that person. With cosplayers that's typically whatever character they're portraying where other forms of portraiture I'm getting to know that actual person instead.
All the pictures I took are in the gallery.
Let me know if these descriptions are starting to get too long. Maybe I'll make a dedicated post on portraits and what I've learned so far.